
1 注册GitHub
注册GitHub详细步骤:
打开官网:GitHub官网
sign up 注册
填完上图中的昵称、邮箱地址(QQ/163邮箱都行)、密码(确保至少有15个字符或至少包括数字和小写字母的8个字符),再验证完成注册
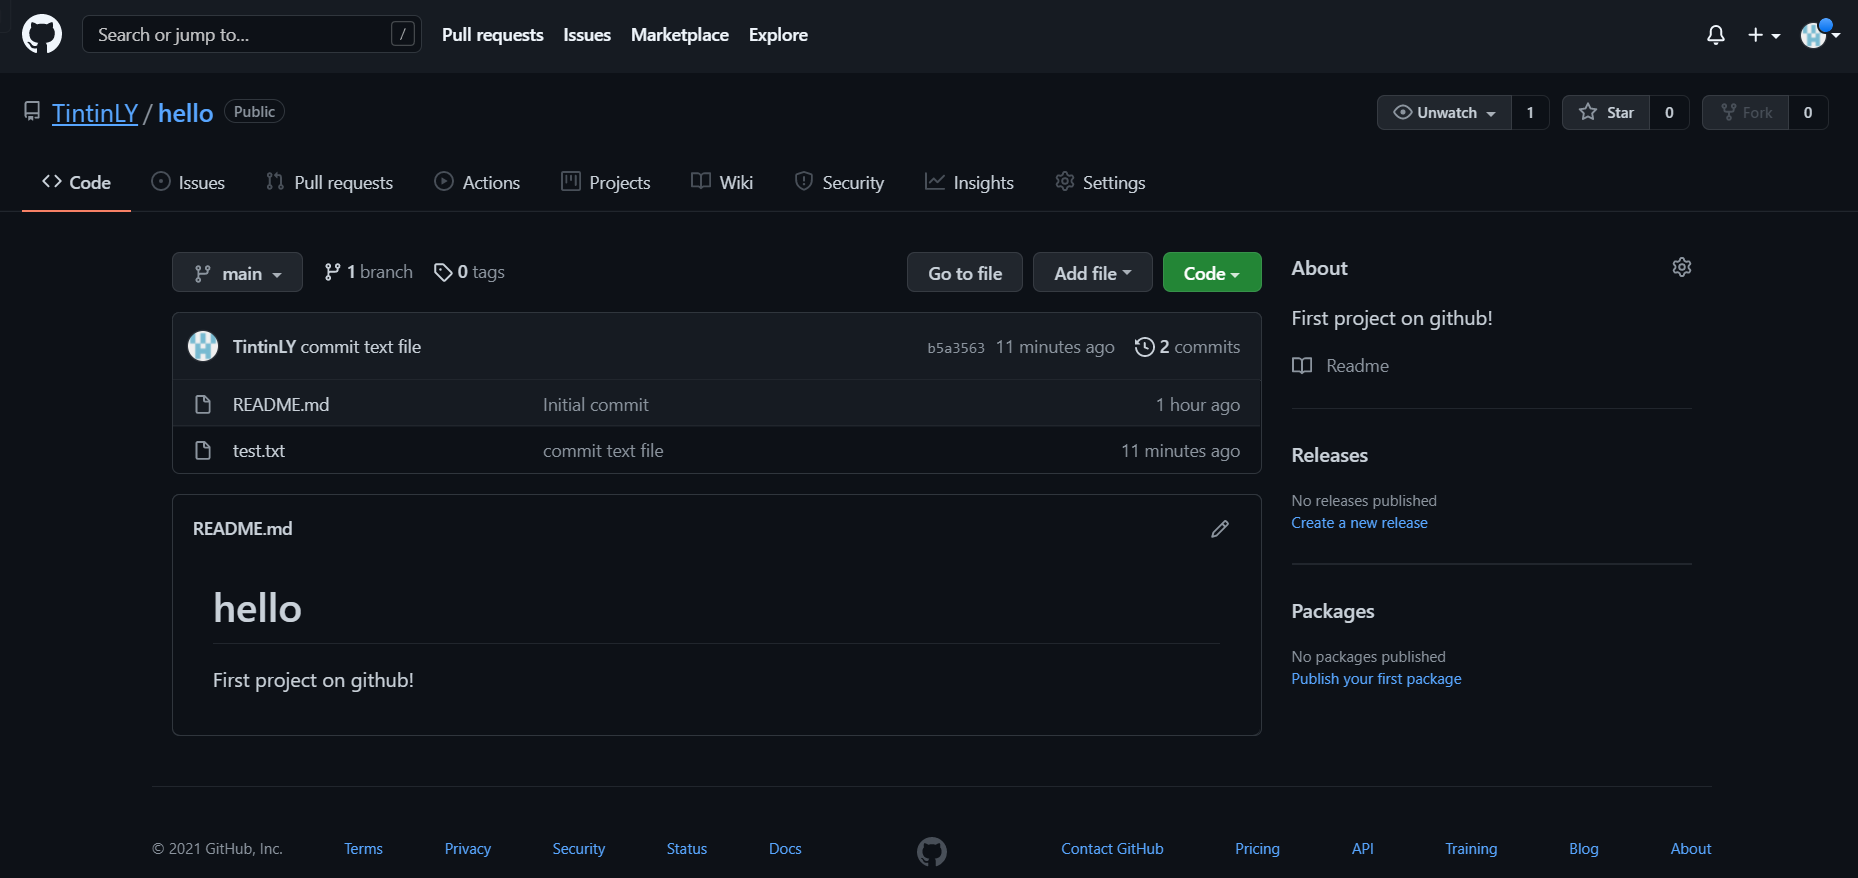
点击创建仓库,得到第一个工程hello
2 Git安装
进入Git官网Git (git-scm.com),点击 Downloads 下载并安装

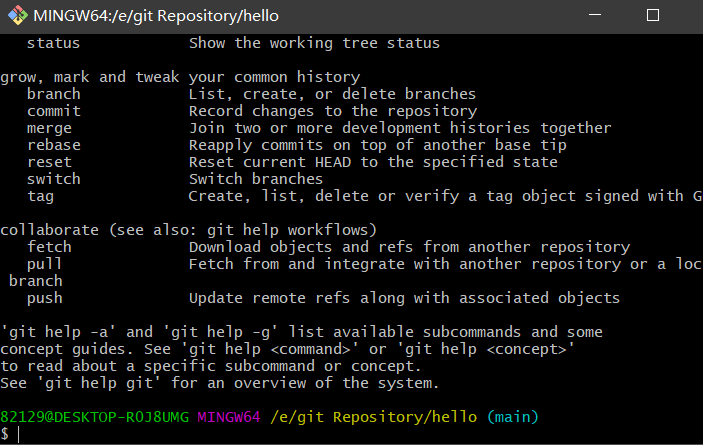
打开 Git Bash, 输入git 回车得到如下图 即完成
3 绑定GitHub并提交文件
在GitHub可以直解上传文件,但是由于网络原因不好用
所以我们利用SSH来完成GitHub的绑定并提交文件,方便快捷。
SSH(安全外壳协议,Secure Shell 的缩写)是建立在应用层基础上的安全协议。SSH 是目前较可靠,专为远程登录会话和其他网络服务提供安全性的协议,利用 SSH 协议可以有效防止远程管理过程中的信息泄露问题。简单来说,SSH就是保障你的账户安全,将你的数据加密压缩,不仅防止其他人截获你的数据,还能加快传输速度。如果想详细了解的话,可以看这篇文章:详述 SSH 的原理及其应用 - CSDN,
下面就详细介绍如何绑定GitHub和提交文件。
绑定GitHub
要用git上传文件到GitHub首先得利用SSH登录远程主机
登录方式有两种:一种是口令登录;另一种是公钥登录。
口令登录使得每次都要输入密码十分麻烦,而公钥登录省去了输入密码的步骤。首先我们得在GitHub添加SSH key配置,而要想生成SSH key,首先要安装SSH,git bash自带了SSH。
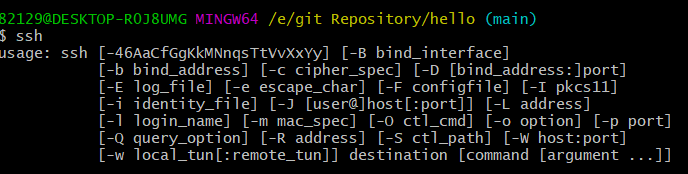
检验SSH是否安装。打开Git Bash 输入ssh,出现下图即可
生成密钥。输入 ssh-keygen -t rsa 命令(注意空格) 敲四次回车键,之后就就会生成两个文件,分别为秘钥 id_rsa.txt 和公钥 id_rsa.pub。
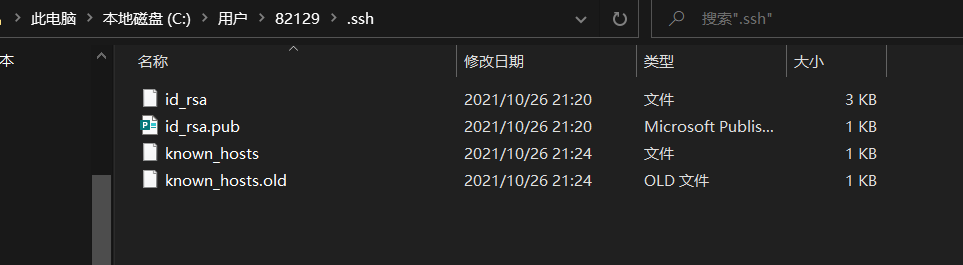
接下来我们要做的事情就是把公钥 id_rsa.pub 的内容添加到 GitHub。复制公钥 id_rsa.pub 文件里的内容,你可以通过目录找到 id_rsa.pub 文件的位置,用记事本打开文件复制。如果你实在找不到文件也没有关系,按照以下步骤直接在 Git Bash 上打开就行:
$ cd ~/.ssh
$ ls
$ cat id_rsa.pub
ps: git中的复制粘贴不是 Ctrl+C 和 Ctrl+V,而是 Ctrl+insert 和Shift+insert
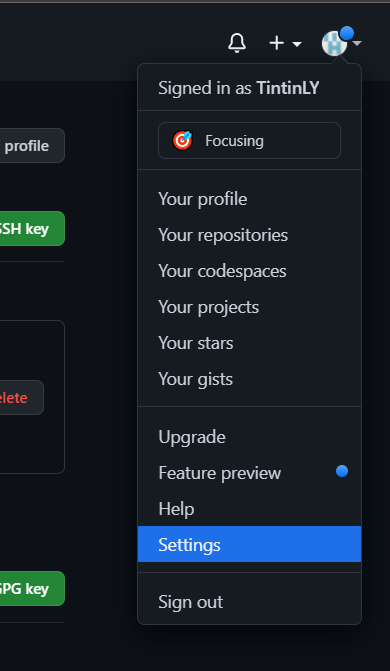
下来进入我们的 GitHub 主页,先点击右上角,再点击 *settings* :
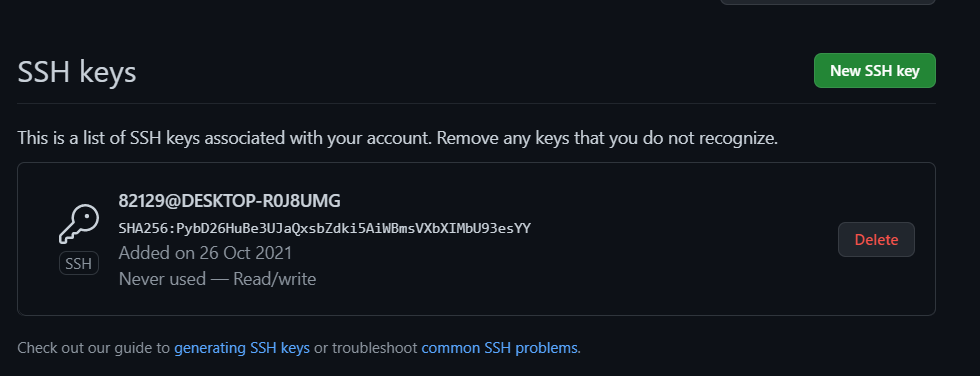
如下图,先点击 *SSH and GPG keys,*再点击 New SSH key.
将复制的公钥 id_rsa.pub 的内容粘贴到 key 内,再点击 *Add SSH key,*如下图:
验证是否成功,我们可以通过在 Git Bash 中输入 ssh -T git@github.com 进行检验:

第一次会出现这种情况,填 yes 就行,若出现下图中的情况,则表明绑定成功:

提交文件
提交文件有两种方法:
第一种:本地没有 git 仓库
- 直接将远程仓库 clone 到本地;
- 将文件添加并 commit 到本地仓库;
- 将本地仓库的内容push到远程仓库。
第二种:本地有 Git 仓库,并且我们已经进行了多次 commit 操作
- 建立一个本地仓库进入,init 初始化;
- 关联远程仓库;
- 同步远程仓库和本地仓库;
- 将文件添加提交到本地仓库;
- 将本地仓库的内容 push 到远程仓库。
克隆远程仓库到本地
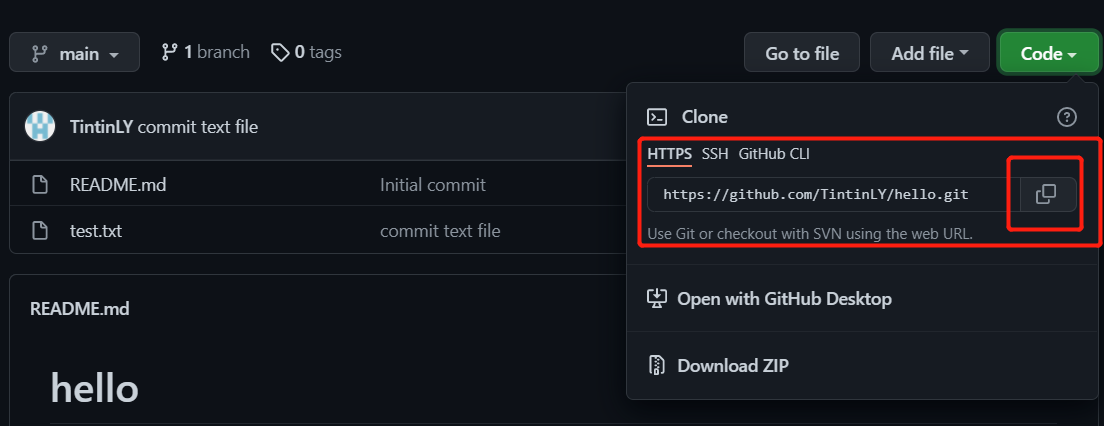
$ cd "E:\git Repository"
$ git clone https://github.com/TintinLY/hello.git
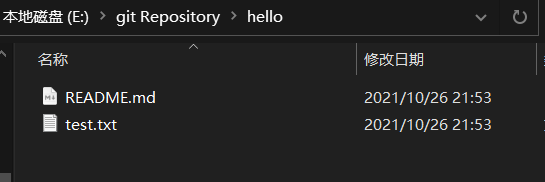
得到内容与远程仓库一致的本地仓库
已有本地仓库关联远程仓库
首先,我们建立一个本地仓库 demo,使用 git init 命令初始化这个仓库
cd "E:\git Repository\hello"
$ git init
修改当前仓库的分支名与远程仓库的分支名一致
$ git branch -m master main关联远程仓库
$ git remote add origin https://github.com/TintinLY/hello.git同步远程仓库与本地仓库
$ git pull origin main回到本地仓库,发现我们已经把远程仓库的内容同步到了本地仓库:

上传文件
创建一个 text.txt 测试文件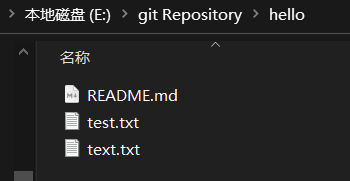
查看仓库状态
$ git status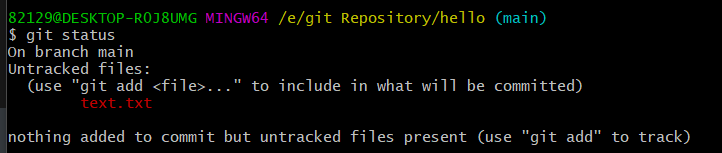
hello 已经是一个 Git 仓库了,而我们刚刚创建的文件 text.txt 没有被追踪,也就是没有提交到本地仓库。
现在我们使用 git add 命令将文件添加到了「临时缓冲区」,再用 git commit -m "提交信息" 将其提交到本地仓库,如下图:
$ git add text.txt
$ git commit -m "commit text file"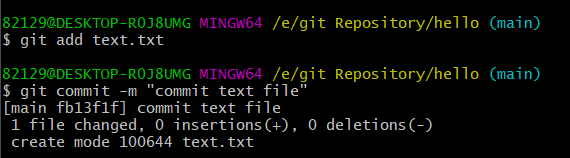
查看仓库提交日志:
$ git log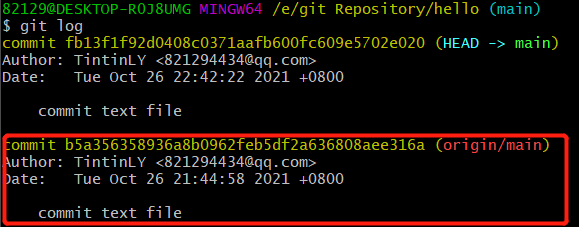
再输入 git status 查看一下仓库状态:

将本地仓库提交到远程仓库,origin是远程主机的名字,若出现连接出错可以使用git init命令重新初始化本地仓库
$ git init
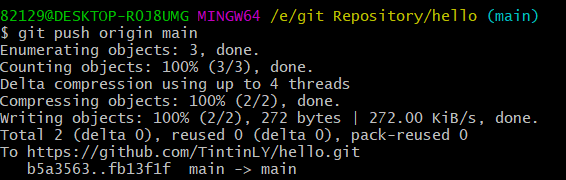
$ git push origin main
第一次上传需要输入密码,验证成功后,如下图:
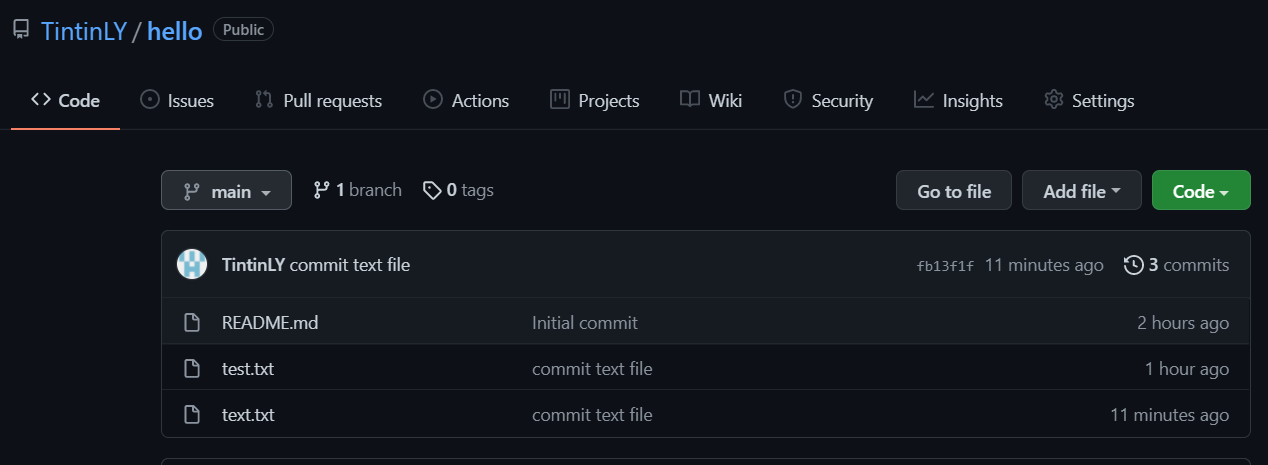
刷新 GitHub 中 text 仓库:
4 购买域名
5 安装node.js和Hexo
安装nodejs
下载地址:node.js官网 安装
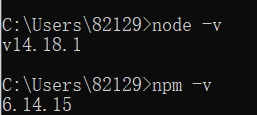
安装完成可以用打开cmd检验一下是否安装成功,用 node -v 和 npm -v 命令检查版本,如下图:
设置npm在安装全局模块时的路径和环境变量
因为如果不设置的话,安装模块的时候就会把模块装到C盘,占用C盘的空间,并且有可能安装好hexo后却无法使用。
在 nodejs 文件夹中新建两个空文件夹 node_cache、node_global,
打开cmd,输入如下两个命令:
npm config set prefix "E:\nodejs\node_global"

npm config set cache "E:\nodejs\node_cache"设置环境变量:win10系统 --> 打开控制面板 --> 系统 -->高级系统设置 --> 环境变量 ,然后在系统变量中新建一个变量名为“NODE_PATH” E:\Program Files\nodejs\node_global\node_modules
然后编辑用户变量里的Path,将相应npm的路径改为:E:\Program Files\nodejs\node_global
在 cmd 命令下执行 npm install webpack -g :

安装Hexo
Hexo就是我们的个人博客网站的框架,在安装之前,我们要先在GitHub上创立一个仓库,
仓库名格式 用户名.github.io
接下来就是安装Hexo,首先在D盘建立一个文件夹 Blog,点开 Blog 文件夹,鼠标右键打开 Git Bush Here,输入npm命令安装Hexo:
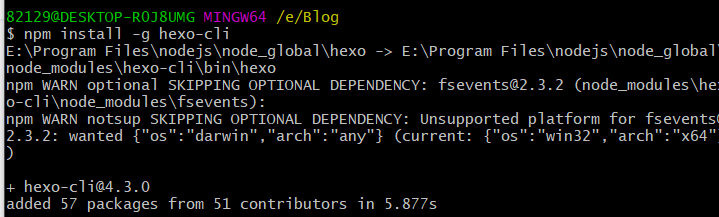
安装npm包的时候报错rollbackFailedOptional: verb npm-session
- 可以临时使用淘宝镜像 npm --registry https://registry.npm.taobao.org install 你想安装的npm包名称
- 安装淘宝镜像 npm install -g cnpm --registry=https://registry.npm.taobao.org cnpm install 你想安装的npm包名称 然后就可以像使用npm一样使用cnpm进行安装了
安装完成后,输入 hexo init 命令初始化博客:
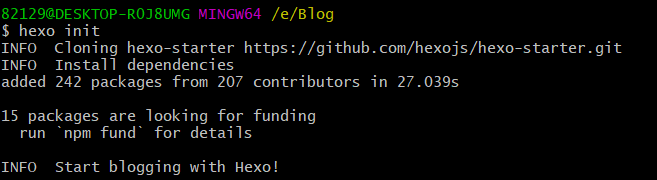
然后输入 hexo g 静态部署:
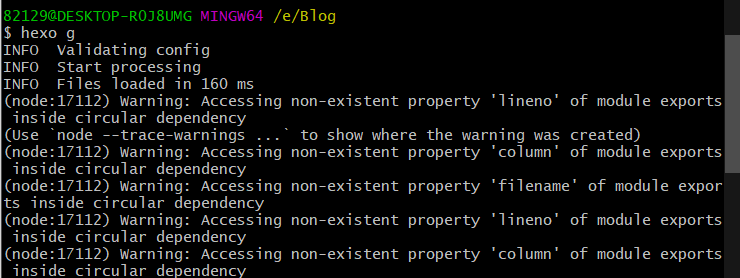
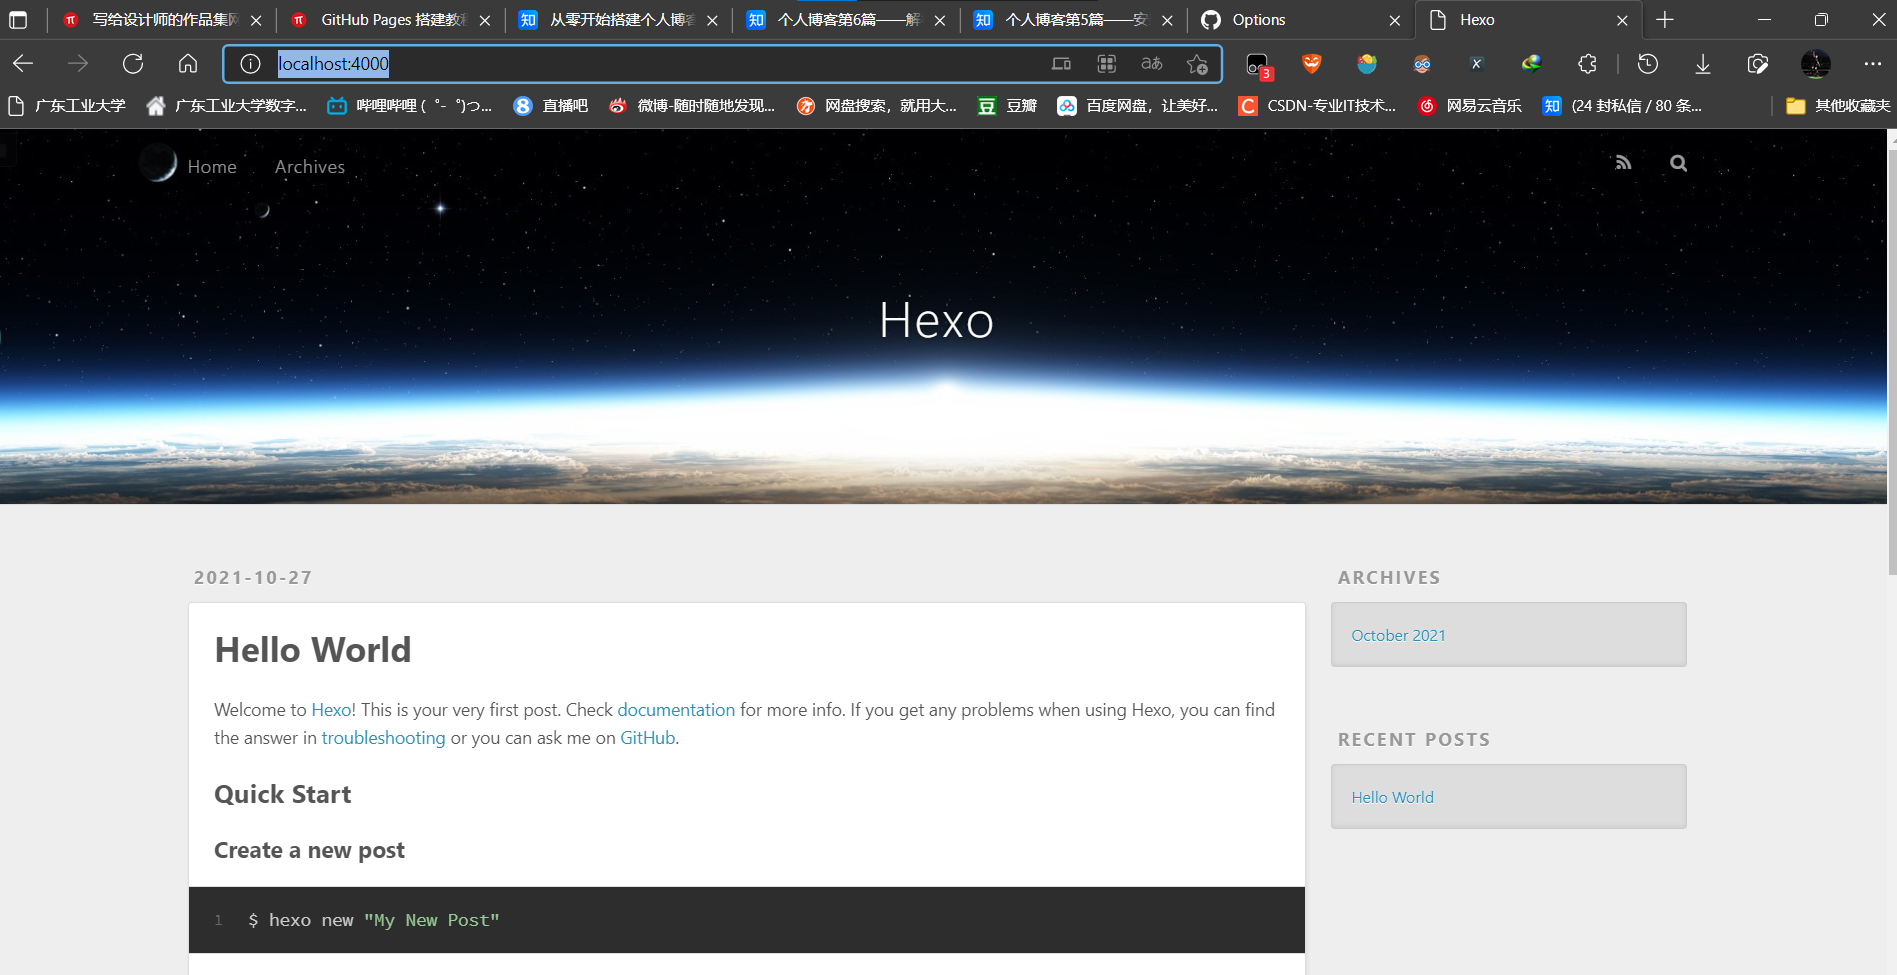
这时网页已经部署完成,输入 hexo s 命令可以查看:
浏览器输入Hexo就可以打开新部署的网页:
将Hexo部署到GitHub
现在回到我们的 Blog 文件夹,用笔记本打开 _config.yml 文件
下滑到文件底部,填上如下内容:
# Deployment
## Docs: https://hexo.io/docs/one-command-deployment
deploy:
  type: git
  repository: https://github.com/TintinLY/TintinLY.github.io.git  #你的仓库地址
  branch: main
然后回到 Blog 文件夹中,打开 Git Bash,安装Git部署插件,输入命令
npm install hexo-deployer-git --save然后分别输入以下三条命令:
hexo clean   #清除缓存文件 db.json 和已生成的静态文件 public
hexo g       #生成网站静态文件到默认设置的 public 文件夹(hexo generate 的缩写)
hexo d       #自动生成网站静态文件,并部署到设定的仓库(hexo deploy 的缩写)
或使用这条指令 hexo d -g 部署到仓库中
现在虽然可以访问我们的网站,但是网址是GitHub提供的:Hexo (tintinly.github.io) 而我们想使用我们自己的个性化域名
6 解析域名
7 设置next主题
更换主题
当前用得最多的是next主题,那为什么用得多呢?当然是符合大多数人的审美。我使用的是next(v7.7.1),下载地址:theme-next/hexo-theme-next
打开博客根目录Blog文件夹,右键Git Bash,输入如下代码将next主题下载到目录Blog/themes:
git clone https://github.com/theme-next/hexo-theme-next themes/next打开根目录下的_config.yml(称为站点配置文件),修改主题(注意冒号后都要有空格):
# Site
title: 枫叶苑  #标题
subtitle: ''
description: 选择有时候比努力更重要     #简介或者格言
keywords:
author: 枫叶     #作者
language: zh-CN     #主题语言
timezone: Asia/Shanghai    #中国的时区

# Extensions
## Plugins: https://hexo.io/plugins/
## Themes: https://hexo.io/themes/
theme: next   #主题改为next
next主题有四种,如下图依次为Muse、Mist、Pisces、Gemini(反正我没看出来后两个有什么区别):
打开目录Blog/themes/next/下的_config.yml(称为主题配置文件),只要将你选的主题前的#删除就行了:
8 优化主题
参考
个人博客第8篇——优化主题(持续更新) - 知乎 (zhihu.com)
1 设置菜单
打开主题配置文件即themes/next下的_config.yml,查找menu,将前面的#删除就行了:
menu:
  home: / || home                      #首页
  archives: /archives/ || archive      #归档
  categories: /categories/ || th       #分类
  tags: /tags/ || tags                 #标签
  about: /about/ || user               #关于
  resources: /resources/ || download   #资源
  #schedule: /schedule/ || calendar    #日历
  #sitemap: /sitemap.xml || sitemap    #站点地图,供搜索引擎爬取
#commonweal: /404/ || heartbeat #腾讯公益404“||”前面的是目标链接,后面的是图标名称,next使用的图标全是图标库 - Font Awesome 中文网这一网站的,有想用的图标直接在fontawesome上面找图标的名称就行。resources是我自己添加的。
新添加的菜单需要翻译对应的中文,打开theme/next/languages/zh-CN.yml,在menu下设置:
menu:
  home: 首页
  archives: 归档
  categories: 分类
  tags: 标签
  about: 关于
  resources: 资源
  search: 搜索
在根目录下打开Git Bash,输入如下代码:
hexo new page "categories"
hexo new page "tags"
hexo new page "about"
hexo new page "resources"此时在根目录的sources文件夹下会生成categories、tags、about、resources四个文件,每个文件中有一个index.md文件,修改内容分别如下:
---
title: 分类
date: 2020-02-10 22:07:08
type: "categories"
comments: false
---

---
title: 标签
date: 2020-02-10 22:07:08
type: "tags"
comments: false
---

---
title: 关于
date: 2020-02-10 22:07:08
type: "about"
comments: false
---

---
title: 资源
date: 2020-02-10 22:07:08
type: "resources"
comments: false
---
注:如果有启用评论,默认页面带有评论。需要关闭的话,添加字段comments并将值设置为false。
2 设置建站时间
打开主题配置文件即themes/next下的_config.yml,查找since:
footer:
  # Specify the date when the site was setup. If not defined, current year will be used.
  since: 2020-02   #建站时间
3 设置头像
打开主题配置文件即themes/next下的_config.yml,查找avatar,url后是图片的链接地址:
# Sidebar Avatar
avatar:
  # Replace the default image and set the url here.
  url: /images/avatar.gif   #图片的位置,也可以是http://xxx.com/avatar.png
  # If true, the avatar will be dispalyed in circle.
  rounded: true   #头像展示在圈里
  # If true, the avatar will be rotated with the cursor.
  rotated: false  #头像随光标旋转
然后将你要的头像图片复制到themes/next/source/images里,重命名为avatar.png。
4 网站图标设置
我是在这个网站找的图标,免费的图标素材网站:Easyicon
下载16x16和32x32的图标后,打开主题配置文件,查找favicon,只要修改small和medium为你的图标路径:
favicon:
  small: /images/favicon-16x16.png
  medium: /images/favicon-32x32.png
  apple_touch_icon: /images/apple-touch-icon-next.png
  safari_pinned_tab: /images/logo.svg
  #android_manifest: /images/manifest.json
  #ms_browserconfig: /images/browserconfig.xml
5 设置动态背景
6 设置背景图片
打开主题配置文件即themes/next下的_config.yml,将 style: source/_data/styles.styl 取消注释:
custom_file_path:
  style: source/_data/styles.styl
打开根目录Blog/source创建文件_data/styles.styl,添加以下内容:
// 添加背景图片
body {
      background: url(images/background.png);//自己喜欢的图片地址
      background-size: cover;
      background-repeat: no-repeat;
      background-attachment: fixed;
      background-position: 50% 50%;
}
7 主页文章添加阴影效果
打开themes/next/source/css/_common/conponents/post/post.styl,修改.post-block,如下:
.use-motion {
  if (hexo-config('motion.transition.post_block')) {
    .post-block {
      opacity: 0;
      margin-top: 60px;
      margin-bottom: 60px;
      padding: 25px;
      background:rgba(255,255,255,0.9) none repeat scroll !important;
      -webkit-box-shadow: 0 0 5px rgba(202, 203, 203, .5);
      -moz-box-shadow: 0 0 5px rgba(202, 203, 204, .5);

    }
    .pagination, .comments{
      opacity: 0;
    }
  }
还有一种方法打开Blog/source/_date/style.styl文件,添加以下代码:
// 主页文章添加阴影效果
.post {
   margin-top: 60px;
   margin-bottom: 60px;
   padding: 25px;
   -webkit-box-shadow: 0 0 5px rgba(202, 203, 203, .5);
   -moz-box-shadow: 0 0 5px rgba(202, 203, 204, .5);
8 添加顶部加载条
在themes/next目录下打开Git Bash,输入:
git clone https://github.com/theme-next/theme-next-pace source/lib/pace打开主题配置文件即themes/next下的_config.yml,找到pace,将enable:false改为true,你还可以选择类型(theme):
pace:
  enable: true
  # Themes list:
  # big-counter | bounce | barber-shop | center-atom | center-circle | center-radar | center-simple
  # corner-indicator | fill-left | flat-top | flash | loading-bar | mac-osx | material | minimal
  theme: minimal
9 设置预览摘要
next(v7.7.1)已经没有如下代码:
auto_excerpt:
  enable: true
  length: 150
所以不需要设置,只要我们在文章中插入 ,该标签之上的是摘要,之后的内容不可见,需点击全文阅读按钮:
<!-- more -->10 设置侧边栏显示效果
打开主题配置文件即themes/next下的_config.yml,找到Sidebar Settings,设置:
sidebar:
  # Sidebar Position. #设置侧边栏位置
  position: left
  #position: right

  #  - post    默认显示模式
  #  - always  一直显示
  #  - hide    初始隐藏
  #  - remove  移除侧边栏
  display: post
11 侧边栏推荐阅读
打开主题配置文件即themes/next下的_config.yml,搜索links(里面写你想要的链接):
links_settings:
  icon: link
  title: 链接网站  #修改名称

links:
  #Title: http://yoursite.com
  百度: https://baidu.com
  鱼C论坛: https://fishc.com.cn
12 添加社交链接
打开主题配置文件即themes/next下的_config.yml,搜索social:
social:
  GitHub: https://github.com/fengye97 || github
  E-Mail: mailto:yinhongfei1018@163.com || envelope
  知乎: https://www.zhihu.com/people/mai-nv-hai-de-xiao-huo-chai-35-19 || gratipay
  CSDN: https://https://blog.csdn.net/Later_001 || codiepie
“||”前面的是链接,后面的是 FontAwesome图标名称。
13 设置博文内链接为蓝色
打开themes/next/source/css/_common/components/post/post.styl文件,将下面的代码复制到文件最后:
.post-body p a{
     color: #0593d3;
     border-bottom: none;
     &:hover {
       color: #0477ab;
       text-decoration: underline;
     }
   }
14. 显示文章字数和阅读时长
从根目录Blog打开Git Bash,执行下面的命令,安装插件:
npm install hexo-wordcount --save然后打开站点配置文件,在文件末尾加上下面的代码:
symbols_count_time:
  symbols: true                # 文章字数统计
  time: true                   # 文章阅读时长
  total_symbols: true          # 站点总字数统计
  total_time: true             # 站点总阅读时长
  exclude_codeblock: false     # 排除代码字数统计
效果如下图:

15 显示站点文章总字数(另一种统计站点总字数的方法)
从根目录Blog打开Git Bash,执行下面的命令,安装插件:
npm install hexo-wordcount --save然后在/themes/next/layout/_partials/footer.swig文件尾部加上:
<div class="theme-info">
  <div class="powered-by"></div>
  <span class="post-count">博客全站共{{ totalcount(site) }}字</span>
</div>
16 设置文章末尾”本文结束”标记
在路径/themes/next/layout/_macro 中新建 passage-end-tag.swig 文件,并添加以下内容:
<div>
    {% if not is_index %}
        <div style="text-align:center;color: #ccc;font-size:24px;">-------------本文结束<i class="fa fa-paw"></i>感谢您的阅读-------------</div>
    {% endif %}
</div>
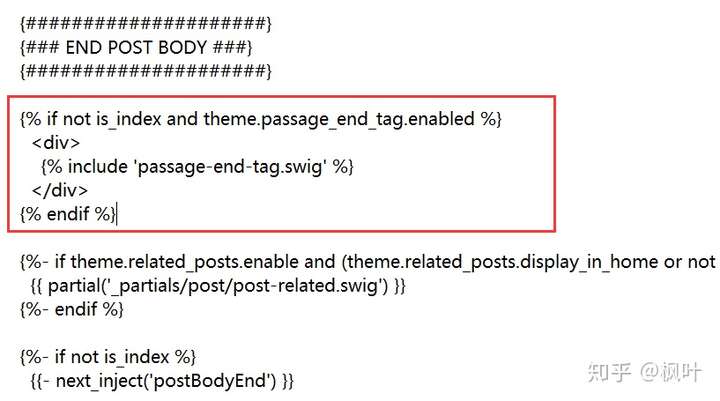
接着打开/themes/next/layout/_macro/post.swig文件,在post-footer前添加代码:
 {% if not is_index and theme.passage_end_tag.enabled %}
   <div>
     {% include 'passage-end-tag.swig' %}
   </div>
 {% endif %}
具体位置如下图:
然后打开主题配置文件(_config.yml),在末尾添加:
# 文章末尾添加“本文结束”标记
passage_end_tag:
  enabled: true
完成以上设置之后,在每篇文章之后都会添加如下效果图的样子:
17 文章末尾添加版权说明
查找主题配置文件themes/next/_config.yml中的creative_commons:
creative_commons:
  license: by-nc-sa
  sidebar: false
  post: true  # 将false改为true即可显示版权信息
  language:
效果图:

18 添加访问量统计
打开主题配置文件即themes/next下的_config.yml,找到busuanzi_count,改为true:
busuanzi_count:
  enable: true
打开/themes/next/layout/_partials/footer.swig,在最后添加如下内容:
{% if theme.busuanzi_count.enable %}
    <script async src="//dn-lbstatics.qbox.me/busuanzi/2.3/busuanzi.pure.mini.js"></script>

    <span id="busuanzi_container_site_pv">总访问量<span id="busuanzi_value_site_pv"></span>次</span>
    <span class="post-meta-divider">|</span>
    <span id="busuanzi_container_site_uv">总访客数<span id="busuanzi_value_site_uv"></span>人</span>
    <span class="post-meta-divider">|</span>
<!-- 不蒜子计数初始值纠正 -->
<script>
$(document).ready(function() {

    var int = setInterval(fixCount, 50);  // 50ms周期检测函数
    var countOffset = 20000;  // 初始化首次数据

    function fixCount() {
       if (document.getElementById("busuanzi_container_site_pv").style.display != "none")
        {
            $("#busuanzi_value_site_pv").html(parseInt($("#busuanzi_value_site_pv").html()) + countOffset);
            clearInterval(int);
        }
        if ($("#busuanzi_container_site_pv").css("display") != "none")
        {
            $("#busuanzi_value_site_uv").html(parseInt($("#busuanzi_value_site_uv").html()) + countOffset); // 加上初始数据
            clearInterval(int); // 停止检测
        }
    }

});
</script>
{% endif %}
19 添加评论功能
我采用的是leanCloud
# Valine
# For more information: https://valine.js.org, https://github.com/xCss/Valine
valine:
  enable: true
  appid: PFljDxR0Q9DIjrqrI1KC61n5-gzGzoHsz # Your leancloud application appid
  appkey: 62eMAFVIEcPIQkulk2C3a9gP # Your leancloud application appkey
  notify: false # Mail notifier
  verify: false # Verification code
  placeholder: Just go go # Comment box placeholder
  avatar: mm # Gravatar style
  guest_info: nick,mail,link # Custom comment header
  pageSize: 10 # Pagination size
  language: # Language, available values: en, zh-cn
  visitor: false # Article reading statistic
  comment_count: true # If false, comment count will only be displayed in post page, not in home page
  recordIP: false # Whether to record the commenter IP
  serverURLs: # When the custom domain name is enabled, fill it in here (it will be detected automatically by default, no need to fill in)
  #post_meta_order: 0
20. 添加Fork me on Github
有两种,分别是:
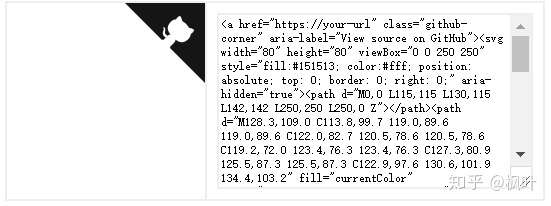
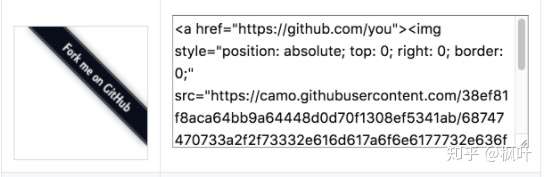
选择你喜欢的类型,打开小猫或者字,复制代码添加到themes/next/layout/_layout.swig文件中,放在<div class="headband"></div>后面:
<div class="headband"></div>
    <a href="https://github.com/fengye97" class="github-corner" aria-label="View source
21 安装RSS插件
为什么要安装RSS插件呢?不了解的可以看看这篇文章:rss订阅是什么意思?为什么要使用RSS?简单来说,RSS是一种协议,允许网站将其内容或其部分内容提供给其他网站或应用程序。通过使用RSS,可以节省宝贵的时间,并将各个站点提供的新闻和信息组织到一个中心点进行查看,也可以通过从使用RSS联合其内容的其他站点导入新闻来向你的站点添加新闻。
(1)安装hexo-generator-feed插件
RSS需要有一个Feed链接,而这个链接需要靠hexo-generator-feed插件来生成,所以第一步需要添加插件,在Blog根目录打开Git Bash执行安装指令:
npm install hexo-generator-feed --save(2)配置feed信息
在站点配置文件末尾加上如下代码:
feed:
  type: rss2
  path: rss2.xml
  limit: 10
  hub:
  content: 'true'
(3)配置rss
打开主题配置文件,搜索rss,将前面的#去掉:
follow_me:
  #Twitter: https://twitter.com/username || twitter
  #Telegram: https://t.me/channel_name || telegram
  微信: /images/wechat_channel.jpg || wechat
  RSS: /atom.xml || rss
效果如图:

21 博文置顶
(1)安装插件
在根目录Blog打开Git Bash,执行下面的命令:
npm uninstall hexo-generator-index --save
npm install hexo-generator-index-pin-top --save
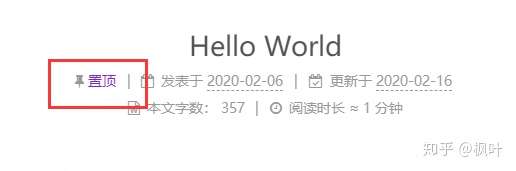
(2)设置置顶标志
打开blog/themes/next/layout/_macro目录下的post.swig文件,定位到<div class="post-meta">标签下,插入如下代码:
{% if post.top %}
  <i class="fa fa-thumb-tack"></i>
  <font color=7D26CD>置顶</font>
  <span class="post-meta-divider">|</span>
{% endif %}
(3)在文章中添加top
然后在需要置顶的文章的Front-matter中加上top: true即可,如下:
---
title: Hello World

top: true

---
效果如图:
22 图片可点击放大查看,放大后可关闭(fancybox可能有点问题,暂时未实现)
打开主题配置文件_config.yml,搜索fancybox,设置其值为true:
fancybox: true进入到theme/next文件夹下,打开Git Bash,输入如下代码:
git clone theme-next/theme-next-fancybox3 source/lib/fancybox23 代码块样式自定义
打开根目录Blog/source/_data/styles.styl,添加以下内容:
// Custom styles.
code {
    color: #ff7600;
    background: #fbf7f8;
    margin: 2px;
}
// 大代码块的自定义样式
.highlight, pre {
    margin: 5px 0;
    padding: 5px;
    border-radius: 3px;
}
.highlight, code, pre {
    border: 1px solid #d6d6d6;
}
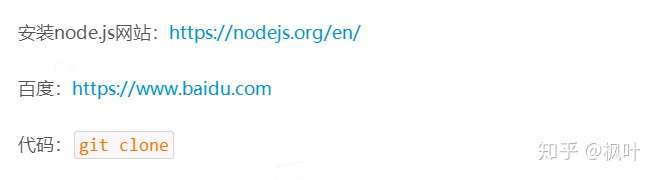
效果图:
24 本地搜索
打开cmd安装插件:
npm install hexo-generator-search查找主题配置文件themes/next/_config.yml中的local_search :
local_search:
  enable: true
  trigger: manual   #手动,按回车键或搜索按钮触发搜索
25 添加 README.md 文件
每个项目下一般都有一个 README.md 文件,但是使用 hexo 部署到仓库后,项目下是没有 README.md 文件的。
在 Hexo 目录下的 source 根目录下添加一个 README.md 文件,修改站点配置文件 _config.yml ,将 skip_render 参数的值设置为
skip_render: README.md # 忽略渲染部署文件保存退出即可。再次使用 hexo d 命令部署博客的时候就不会在渲染 README.md 这个文件了。
26 自定义鼠标样式
打开themes/next/source/css/_custom/custom.styl,在里面写下如下代码
// 鼠标样式
  * {
      cursor: url("http://om8u46rmb.bkt.clouddn.com/sword2.ico"),auto!important
  }
  :active {
      cursor: url("http://om8u46rmb.bkt.clouddn.com/sword1.ico"),auto!important
  }
其中 url 里面必须是 ico 图片,ico 图片可以上传到网上(我是使用七牛云图床),然后获取外链,复制到 url 里就行了
27 加上萌萌的宠物
具体实现方法 在终端切换到你的博客的路径里,然后输入如下代码:
npm install -save hexo-helper-live2d然后打开Hexo/blog/themes/next/layout 的_layout.swig,将下面代码放到</body>之前:
(注意,由于官方更新了包,所以画删除线的不用弄)
然后在在 hexo 的 _config.yml 中添加参数:(具体配置可以看官方文档)
live2d:
  enable: true
  scriptFrom: local
  pluginRootPath: live2dw/
  pluginJsPath: lib/
  pluginModelPath: assets/
  model:
    use: live2d-widget-model-wanko
  display:
    position: right
    width: 150
    height: 300
  mobile:
    show: true
然后hexo clean ,hexo g ,hexo d 就可以看到了。
28 点击爆炸效果
跟那个红心是差不多的,首先在themes/next/source/js/src里面建一个叫fireworks.js的文件,复制效果代码:
打开themes/next/layout/_layout.swig,在</body>上面写下如下代码:
{% if theme.fireworks %}
   <canvas class="fireworks" style="position: fixed;left: 0;top: 0;z-index: 1; pointer-events: none;" ></canvas>
   <script type="text/javascript" src="//cdn.bootcss.com/animejs/2.2.0/anime.min.js"></script>
   <script type="text/javascript" src="/js/src/fireworks.js"></script>
{% endif %}
打开主题配置文件,在里面最后写下:
# Fireworks
fireworks: true
29 Hexo添加文章时自动打开编辑器
首先在Hexo目录下的scripts目录中创建一个JavaScript脚本文件。 如果没有这个scripts目录,则新建一个。 scripts目录新建的JavaScript脚本文件可以任意取名。 通过这个脚本,我们用其来监听hexo new这个动作,并在检测到hexo new之后,执行编辑器打开的命令。
将下列内容写入你的脚本:
var spawn = require('child_process').exec;
hexo.on('new', function(data){
  spawn('start  "markdown编辑器绝对路径.exe" ' + data.path);
});